Homemade Buttermilk Waffles: Your Easy Path to Fluffy, Crispy Perfection
Imagine a breakfast that transcends the ordinary, transforming a simple morning meal into a gourmet experience. We’re talking about homemade buttermilk waffles – those golden-brown beauties that are irresistibly crispy on the outside, yet unbelievably light and fluffy on the inside. Forget the boxed mixes; crafting these culinary masterpieces from scratch is surprisingly easy and delivers a depth of flavor and texture that store-bought options simply can't match. Whether it's a leisurely weekend brunch or a special treat on a weekday, our guide will help you unlock the secret to perfect
classic buttermilk waffles, ensuring a truly unforgettable start to your day.
The Secret to Superior Waffles: Understanding Buttermilk's Magic
The star ingredient in our quest for perfect waffles is, undoubtedly, buttermilk. Buttermilk isn't just a fancy name; it's the key to achieving that coveted tender crumb and slight tang that elevates these waffles above all others. Its acidity plays a crucial role in two ways:
- Tenderizing Effect: The lactic acid in buttermilk works to break down gluten in the flour, resulting in a significantly more tender and less chewy waffle. This is what gives homemade buttermilk waffles their melt-in-your-mouth quality.
- Leavening Power: When buttermilk interacts with baking soda (a common leavening agent), it creates a powerful fizzing reaction. This produces carbon dioxide bubbles that expand during cooking, giving the waffles their incredible lift and airy, fluffy texture. Without buttermilk, your waffles would be denser and less delicate.
But what if you don't have buttermilk on hand? Don't despair! You can easily create a substitute, often called "clabbered milk," with ingredients you likely already have. Simply combine regular milk (dairy or non-dairy) with an acid like lemon juice or white vinegar. For every cup of milk, add one tablespoon of lemon juice or white vinegar. Stir it gently and let it sit for 5-10 minutes until it slightly curdles and thickens. While not identical to traditional buttermilk, this homemade version will effectively mimic its tenderizing and leavening properties, ensuring your fluffy buttermilk waffles still achieve fantastic results.
Crafting Your Perfect Buttermilk Waffle Batter
The beauty of classic buttermilk waffles lies in their simplicity. You'll likely find most of the necessary ingredients already in your pantry: flour, sugar, eggs, butter, baking soda, and of course, buttermilk. The process of combining them is straightforward, but a few expert tips can make all the difference between good waffles and truly great ones.
First, always combine your dry ingredients thoroughly in one bowl and your wet ingredients in another. This ensures even distribution of leavening agents and flavors. When it's time to mix them, gently pour the wet into the dry. The golden rule here is
do not overmix. A few lumps in your batter are perfectly fine, even desirable. Overmixing develops the gluten too much, leading to tough, chewy waffles instead of the light, airy kind you're aiming for. Stir just until the ingredients are combined.
Another valuable tip is to allow your batter to rest for 10-15 minutes before cooking. This resting period gives the gluten a chance to relax and the leavening agents a moment to begin their work, resulting in an even more tender and consistent waffle. This kind of thoughtful preparation, akin to the affection and care passed down through generations of home cooks, is what elevates a simple recipe into a cherished family favorite. Indeed, much like the timeless recipes that embody
Grandma’s Buttermilk Waffles: Fluffy, Crispy, & Made with Love, putting a little extra love and patience into your batter will yield extraordinary results.
Mastering Your Waffle Iron for Crispy Perfection
Once your batter is perfectly prepared, the waffle iron becomes your best friend in the quest for crispy buttermilk waffles. A well-preheated waffle iron is paramount. Allow it to heat up completely, usually indicated by a light or a timer, before adding any batter. This ensures immediate cooking and prevents sticking, leading to that desirable golden-brown exterior.
Lightly grease your waffle iron plates, even if they're non-stick, especially for the first few waffles. A little melted butter or cooking spray will ensure an easy release and contribute to the crispy texture. When adding the batter, don't overfill the grids. Most waffle irons have a sweet spot, and overfilling can lead to uneven cooking and messy overflow. Start with a conservative amount and adjust as needed for subsequent waffles.
The cooking time will vary depending on your waffle iron's wattage and the desired crispiness. Resist the urge to peek too soon! Opening the iron prematurely can deflate your waffles. Wait until steam significantly reduces or stops, and the indicator light (if your iron has one) signals readiness. For extra crispiness, some chefs recommend leaving the waffle in for an additional 30 seconds after the light goes off. Serve your homemade buttermilk waffles immediately to enjoy them at their peak crispy-fluffy perfection. If you're cooking for a crowd, you can keep finished waffles warm on a wire rack in a low oven (around 200°F/90°C) without losing their crispness.
Beyond the Basic Buttermilk Waffle: Topping & Serving Ideas
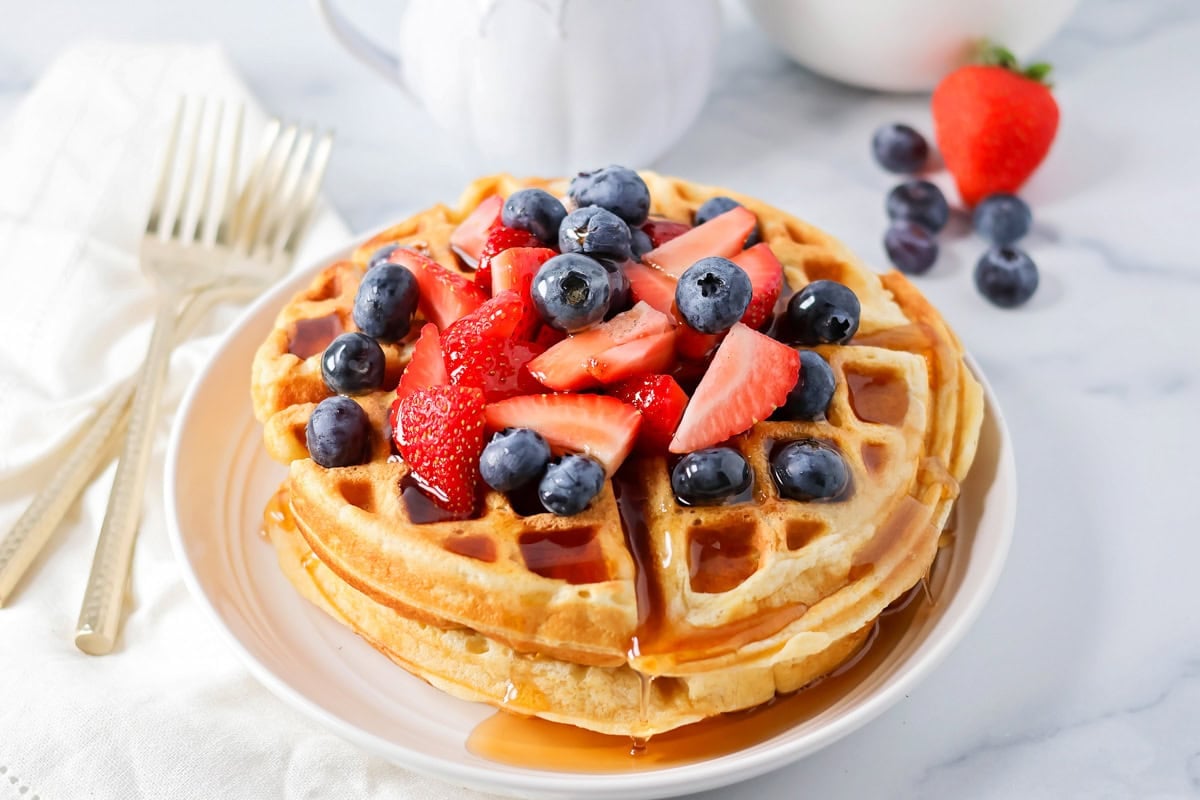
While a stack of warm, golden buttermilk waffles with a pat of butter and a drizzle of pure maple syrup is classic perfection, the beauty of homemade waffles lies in their versatility. They serve as a delicious canvas for an array of toppings, allowing you to customize your breakfast or brunch experience to your heart's content.
For those with a sweet tooth, the options are endless:
- Fresh Berries & Whipped Cream: A vibrant medley of strawberries, blueberries, raspberries, and a dollop of freshly whipped cream adds freshness and elegance.
- Fruit Compotes: Homemade fruit compotes (berry, apple, or peach) made with just a touch of sugar can elevate your waffles to a new level.
- Chocolate Delights: Chocolate chips, chocolate syrup, or a dusting of cocoa powder for the ultimate indulgence.
- Caramelized Bananas: Sauté sliced bananas in butter and brown sugar for a decadent, warm topping.
- Nutty Crunch: A sprinkle of chopped nuts (pecans, walnuts) or a drizzle of nut butter provides a satisfying texture contrast.
Don't limit yourself to sweet options! Buttermilk waffles also make an excellent base for savory creations:
- Fried Chicken & Waffles: The ultimate comfort food pairing, the crispy, savory chicken beautifully complements the slightly tangy waffles.
- Eggs Benedict Waffles: Substitute English muffins with fluffy waffles for a unique twist on this brunch classic.
- Savory Spreads: Top with cream cheese, smoked salmon, and fresh dill for a sophisticated brunch option.
No matter your preference, these easy homemade buttermilk waffles provide a delicious foundation for any topping adventure. They truly have the power to turn any morning into an extra-special occasion, feeling like a treat from a beloved diner but with the undeniable warmth of home.
Making homemade buttermilk waffles is more than just cooking; it's an act of creation, a step towards mindful eating, and an incredibly rewarding experience. With just a few simple ingredients and a little bit of patience, you can consistently achieve that perfect balance of crispy exterior and fluffy interior. So, gather your ingredients, fire up your waffle iron, and prepare to delight your taste buds with the best homemade buttermilk waffles you’ve ever tasted. Your mornings will thank you!